Monday 1 April 2013

beautiful fluffy pancakes

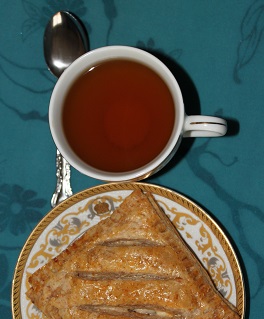
ohhh pancakes. Who doesn't like a cup of hot tea or cold juice with freshly made fluffy yummy pancakes?
I have some recipes of this handy dish like these wholemeal chocolate pancakes but I've been looking for a lighter version of traditional pancakes.
One day I was thinking about them and ALAS! just scanning through the magazine I came across this simple, light and yummy recipe.


I went to the kitchen and tried them right away. They turned out fluffy, soft, not too sweet and light. Now this recipe is a keeper and I use it quite often.
Without any further words here is the recipe.

Ingredients:

125g self-raising flour
2tsp fine sugar
1/2tsp baking powder
a pinch of salt
1 egg, separated
150ml milk, preferably low-fat
1tsp vanilla extract
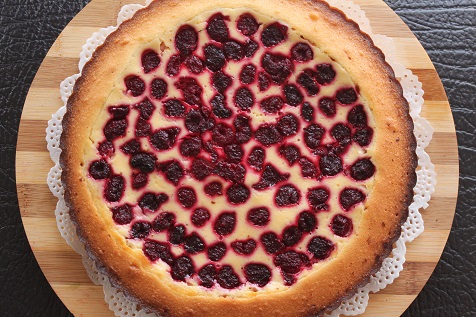
50-100g blueberries or raspberries
oil or oil spray for frying

Preparation:

  • Place flour, sugar, baking powder and salt into a mixing bowl. Stir a couple of times.
  • Combine the egg yolk with milk and vanilla, whisk into the dry ingredients until smooth batter is formed. In a separate small bowl whisk the white until foamy. Carefully fold in the white into the batter.
  • You can cook them as they are for plain pancakes or fold in berries for flavoured ones. I find adding berries directly to the batter more comfortable and easier to use, besides they don't stick out too much  that lets the pancakes brown more evenly on the second side. I also found using thawed raspberries easier.

  • Heat a nonstick flat pan. Spray with oil or just pour a little bit of oil and let it spread over the pan. Put a spoonful of the batter into the pan making sure there are 2-3 berries per pancake. Once you see bubbles forming and the edges are slightly dry, flip the pancake and cook on the other side.

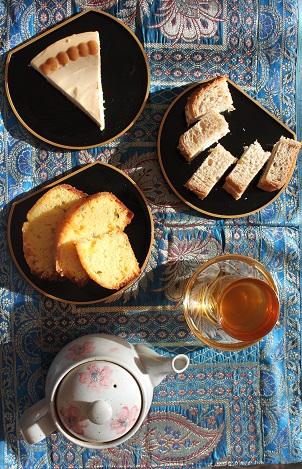
  • Transfer to a plate. If you'd like the top crust stay crispy and firm place them in one layer. I prefer pancakes with some light marmalade, jam or sour cream. And of course maple syrup is always an option.

Enjoy!!!

While I was taking pictures of pancakes looking for a perfect one I noticed my little helper snatching a pancake away.
They were really good.

P.S. Recently my dear sister-in-law while visiting gave me such a lovely idea to try adding some chopped nuts in batter before making these yummy pancakes. I tried and it was delicious. From now on part of my little goodies are always with nuts.
Another great idea is to finely chop some chocolate (preferably dark one) and add to the batter before frying pancakes. It's a delicious yet simple way to have your pancakes.

That's all for now...
take care there.

Sunday 31 March 2013

it's tea time!!!

It's tea time!!!


I love tea and this warm, cosy feeling, aromatic herbs and sweet things that come along with it.
It's tea time, I say, and serve a cup of flavorful drink with some...

passion fruit pound cake or
a generous pieces of dulce de leche cheesecake.

Tea is a great tradition in many countries and in many houses. It varies a lot and the way you drink your cup of tea is totally up to you. Black, green, white or pink, herbal or fruit - those little or large leaves are an inevitable part of a tea drinking ritual.
Another part is ....  the dessert.
I would like to share these 2 recipes I was enjoying with a cup of freshly made fruity tea the other day.


Passion fruit pound cake. (This recipe is originally from David Lebovitz's book Ready for Dessert: My Best Recipes)
batter:
1 and 1/2 cup ( 210g) all-purpose flour
1 tsp baking powder
1/4tsp salt
170g unsalted butter, softened
170-200g sugar (depends on your taste, I put minimum, the recipe calls for 200g)
grated zest of 2 oranges
3 large eggs, at room temperature
1 tsp vanilla extract

passion fruit glaze:
125ml strained passion fruit pulp (from 5-7 fruits) - about 1/2 cup (you can use frozen passion fruit pulp if that's all available)  -  I used about 95ml strained passion fruit juice and half of the left pulp went to the batter - optional
50-60g sugar (I used brown sugar)


Preparation:
  • Grease and line (cover at least the bottom) of a loaf tin (I used 2 pans - one 2lb and one 1lb and I didn't really butter them. Liners were enough)
  • For the batter: Mix together flour, baking powder and salt. In a different bowl or a stand mixer beat together butter, sugar and orange zest until light and fluffy, about 3-5 minutes. In a small bowl lightly whisk the eggs and vanilla. With a mixer still running gradually add the egg mixture and beat until just incorporated, scraping down the sides if needed. It is normal if the mixture looks a bit curdled.
  • With a rubber spatula, fold flour into the butter-egg mixture. Mix it well but until just combined, do not overmix it. (If using passion fruit left over pulp like me, this is the point to old it in.)
  • Heat the oven to 175C (350F). If using one tin place all the batter. If using two tins transfer roughly 2/3 of the batter into the bigger one and the rest into a smaller tin. Smooth the top with a rubber spatula. Bake in a preheated oven until the toothpick inserted in the center comes out clean or for about an hour. (I used two tins and had to watch the cakes. Generally it took about 35 - 40 minutes for them to bake.) Take out from the oven and let it cool, first in the tin for 5 minutes, then on a wire rack for 15 minutes. (don't forget to peel of the parchment paper from the bottom).
  • While the cake is cooling, make the glaze. In a small bowl gently mix passion fruit juice and sugar. Don't let all the sugar dissolve.
  • Transfer the cake to a plate. Using a wooden skewer, poke the top of the cake all the way through to the bottom for about 50 times (many many times). Spoon half of the glaze on top and the rest on the sides, turning the cake gently if needed. Use up the glaze that collects on the plate by rubbing the bottom and the sides of the cake. (again if making two cakes divided the glaze with the ratio 2/3 for a bigger one and 1/3 for a smaller cake.)

  • Slice right before the serving and have it as it is or with some summer berry compote.


Dulce de leche cheesecake.


Ingredients:

30g butter, cut into small cubes and softened
65g graham crackers (or digestive biscuits), crumbled (want to crumble fast and hustle-free? see the tip below)
65ml double cream (whipping cream)
1tsp powdered gelatin, in 1,5 tbsp water
225g cream cheese (I use homemade soft cheese)
100g dulce de leche


Preparation:
  • In a bowl mix butter and crackers. Spoon into a loose-bottom spring form and press gently. Place in the fridge for about 30 minutes or until firm to touch.
  • Whip the cream until sot peaks form. Very gently heat gelatin until it just dissolves into water completely. (You can either do it over simmering water or in a microwave few seconds at a time.)
  • Mix together cheese and dulce de leche. Carefully fold in whipped cream and dissolved gelatin and stir well.
  • Spoon the mixture on top of the base, smooth with spatula and refrigerate for two hours or until set and firm.
  • If you have any dulce de leche left, use it to decorate the top of the cheesecake.

I also have just made some yummy mocha walnut cookies.

Hope you enjoy your tea as much as I do and will try the recipes to complement your favourite cup of ... whatever you like most.

That's all for now...
take care there.

TIP:  If you want to crumble biscuits fast, break them into big piece and place in a zip lock bag making sure to let as much air out as possible. Press biscuits with a rolling pin until crushed to the desired consistency.

creme fraiche raspberry tart

Every summer my family garden produces beautiful berries in such abundance that my mom has to make jams, desserts, preserves, sauces ... you name it. She cooks with them, mashes them with some yogurt or milk, eats as they are or freezes them.


It is natural you tend to make more fresh berry desserts during this season. So when I got my hands on beautiful fresh and some frozen but not less beautiful and yummy raspberries I knew I wanted to make sour creme raspberry pie my mom used to make. Well unfortunately both of us couldn't remember the recipe so I searched online and came across the following tart which is now a keeper with me.
About a week ago I took it to a picnic with my sweet lady friends and they loved it. The crust of this tart is much easier to make and hustle free but so nice and complements sweet and tangy raspberry filling so well.


The original recipe was posted by Becks here. (Thank you VERY MUCH for this.) She has very nice and clear step by step picture instructions if you are a visual person. She also describes a gluten-free version of this tart which is very helpful for people who are gluten intolerant.
The recipe calls for creme fraiche but you can easily use sour cream instead.

So here is what you will need:

113g butter (1 stick), softened
3/4 cup sugar, divided 1/2 and 1/4 cup
pinch a salt
4 large eggs, room temperature
1tsp vanilla extract
1 cup white flour (as the climate I live is humid I tend to add a couple of tbsp more especially when the humidity rises)
3/4 cup (180g) reduced fat creme fraiche
2 cups fresh or frozen raspberries (I honestly don't think I use 2 cups of frozen ones per tart. But what I know is that 500g bag of frozen raspberries is ideal for two tarts like that. If using frozen berries, thaw them completely in a colander over a bowl to let liquid drain.)
tart tin preferably with a removable bottom.


Here is what you will need to do:
  • In a big mixing bowl combine butter, 1/2 cup sugar and salt and beat until fluffy and mixed. Add 3 eggs and 1/2 tsp vanilla and beat until smooth and well incorporated. The mixture might look a bit curdled but it will come together eventually.
  • Start adding flour a bit at a time. Mix in 1 cup of flour until just combined, do not over beat. If you see the mixture does not keep swirls then add a couple of tbsp more, one at a time.
  • Spread the batter around the bottom and the sides of a tart pan, pushing it up the sides to make a border. 


  • Preheat the oven to 350F (180C). However, you know your oven best so you might need to adjust the temperature. And remember if your oven is fan forced reduce the temperature by 20C.
  • Now it is time to make creme fraiche filling. Combine creme fraiche, 1 egg, 1/2 tsp vanilla and 1/4 cup sugar and beat until well mixed and smooth. Pour over the prepared batter and slightly spread it over. And here come the r-r-r-raspberries. I do take some time with arranging berries, placing them in circles. I start from the sides moving towards the centre making sure that berries are distributed evenly on top of the crust. I know it is a bit time consuming but I do it to make sure that everyone gets a piece with lots of yummy goodness on it.

  • Bake your tart in a preheated oven for 50-60 minutes or until the shell is golden and the centre is firm. Do not over cook. Take out and let it cool before transferring to your serving dish. You can dust with some icing sugar for extra sweetness but for me tart is great as it is.

It's tart-elicious!!! Enjoy!!!

Let me know if you tried it or made some variations to the recipe.
That's all for now...
take care there.

Monday 18 March 2013

Chocolate brioche

Yesterday my love friend called me and some other friends of ours for a get together day. I had so much fun and great yummy food, flavorful Moroccan mint tea and chocolate cupcakes.
I couldn't come empty-handed though. and besides I had this long-time craving for a chocolate brioche which I made with some really really dark chocolate.


It turned out very good, soft and of course chocolaty.
Ladies loved it and I am happy.
If you decide to make it should be done the day before as the dough requires the rest overnight. Other than that it is just like making any bread... more or less. (more chocolate for sure)
I made half of the recipe below and it was still enough for a 2lb tin loaf (22cm x 11cm x 5,5cm). It didn't rise a lot over the tin loaf but it was perfect for me. One nice and neat loaf to munch.

Ingredients:

the dough:
500g cake flour (see tips for making cake flour)
50g brown sugar
1g instant yeast
10g salt
6 eggs
250g unsalted butter, cut into small cubes
100g dark chocolate, roughly chopped
an egg yolk with a little bit of milk, lightly beaten

the chocolate ganache:
60ml cream
50g chocoalte, chopped


Directions:

  • Place cake flour, sugar, yeast, salt and eggs in the bowl of a mixer. Using K-beater mix for about 5-8 minutes at medium speed until a firm dough forms.
  • Add butter little by little until everything is well incorporated and the dough has a smooth appearance (it took me long but the result was well worth it).Place the mixture in a lightly oiled bowl, cover with a cling film and refrigerate overnight.
  • Turn the mixture out on a floured surface. Knead for a minute to make it pliable, press it flat using hands until it is about 1 cm thick. Sprinkle chopped chocolate over and roll tightly. Line a bread tin or grease it lightly and place the dough inside, cover with a clean tea towel.
  • Leave to rise in a warm place until it doubles for about 60-90 minutes. Since the dough was straight from the fridge don't worry if it doesn't start rising right away.
  • Preheat the oven to 180C (360F). Once the dough has risen, brush it lgihtly with a beaten egg. Be careful not to press much, so that you don't to knock the dough down. Bake for 25-30 minutes or until golden brown and sounds hollow when tapped at the bottom.
  • To make chocolate sauce warm cream till almost boiling point, add chopped chocolate. Stir until smooth. Pour over the brioche or serve warm separately.

Enjoy!!! Yumm!!!

garden beauties


I already mentioned before that I love gardening as well as just sitting outside with a cup of fresh tea (or just like that) looking at the garden, watching birds and plants, thinking and planning. Thanking God for this beauty around us.
So today I wanted to share some pictures of little cute things we see in gardens.
Little beauties.
Enjoy!


Here an update for my growing tomatoes I planted into soil 6 days ago. I expected that many of them would die but some survived sudden bright light and soil environment.


 A couple of them actually are doing really well.


aaaah I know it is silly but I am already waiting for tomatoes :)


Tuesday 12 March 2013

out and about my garden

Good morning, afternoon or evening or maybe even good night.
Hope you all are in good health and good mood.
We have recently moved to a new place and now I have a lawn and an open space to put all my plants out and grow new ones. That's my daughter helping me with some weeds


So yesterday was my gardening day.
I do water my plants every morning which also gives me a chance to enjoy lovely weather and breath fresh air and have a quiet minute while my baby is still asleep.
Besides I sprouted some tomatoes and as I forgot about them for quite some time they started growing in a bag which was NOT good at all. I remember I bought those beautiful local tomatoes and couldn't help but scoop out the seeds, dry them and soak in a damp kitchen towel. So now they did their work and it was time for me to give them more room to grow.
As the place they started growing was small and dark they were pretty weak and I don't really expect many of them survive in fresh air with full sunlight. It is a shock for them. I know it is totally my fault and it is unacceptable. Lesson learned (hopefully).
Here they are my little poor weak tomatoes.

Update on my tomatoes available here.

I also had to separate some lemons that grew. Here they are little green beauties.

I put all the seeds out of a store bought lemon in one place so they sprouted all together and after some time were begging to separate them. Now, for those of you who are familiar with growing lemons, I am fully aware that I won't get any fruit bearing plants or it will take sooooo long and the fruit will be so different which makes it the same as no fruit. I am actually planting them for the sake of planting and growing. And was just interested how fast or how slow in that case lemons grow.
Here they are separated and happy.


Here is something that I guess is a watermelon or a melon. Someone dropped a seed into my herb pot so it started growing. Now I am so interested what it is that I had to keep it but take it out from my herbs as it was taking more and more space in a little pot.
hmmmm on second thought it also can be a bean. Let's see what will grow out of this little chap.

Apart from beautiful weather that day I had another true reason to start planting and replanting. I have this beautiful climber which is growing, climbing and blooming. And dropping seeds which also start growing. I got 5 new little plants.

Since I know it will get more seeds and plants, I promised to give some to my friend. She has a beautiful porch but I just can't see some artificial flowers hanging around there.
So when my little seedlings grew bigger and stronger like that.


I decided to separate them, to give them space to grow bigger and to be able to bring one to my friend's house. Oh by the way they have beautiful purple flowers that can be seen mostly early morning.

While enjoying the sight of these cuties I noticed little buddy who I guess got a bit lost in a flower. And since I'm in love with photography and I got this wonderful macro lens I HAD to take its picture.
Here it is.

I guess I will stop right here for now.
I think I will share some thoughts and pictures of my flowers next time.
Let me know what you think and if you have any ideas what I can try to sprout. (still have to try peaches, plums and some herbs). But let's see when I get time for this.
That's all for now...
take care.


Sunday 10 March 2013

chocolate passion cupcake

uffff it's been a while since my last visit. That's what happens when you get into housework and making projects as well as meeting with friends and taking care of a baby. :)
Well in addition to all the above we got really sick.
Anyway I hope I will keep on posting my thoughts, recipes and other stuff more regularly and often from now on.
I had some friends over yesterday for a surprise party and really wanted to make something really yummy for a dessert both for us adults and kids.

I came across the recipe for this chocolate goodness a couple of weeks ago and since then have been looking for a good excuse to make these delicious cupcakes. And finally I got one!!!
I guess it is true that if you make your food with love, passion and enjoyment it will come out million times better and yummier.
To start with the batter smelled so good that I could at it without even baking. The cupcakes came out so perfect and smooth. That was my second temptation to eat them all. Plus this scrumptious chocolate ganache which is not too much and not too little. Just the right amount to enjoy.

You dig into this little chocolate dream and here is yet another surprise with totally different flavor. Salted caramel filling oozing out.

mmmmmmm
I think I need to go make some more right now.
They look so classy, people will ask which place you got them from.
I came across this recipe in one of the magazines I get every week and usually they lack instructions, call for crazy, hard to find ingredients or just not to my taste. But this pretty sweet dish turned out to be amazingly good.

My friends and their husbands loved these cupcakes as well.
When I first saw the picture I thought it might be time and effort consuming to make those but once I started I realized it is not that difficult after all. Besides all this chocolate and caramel aromas filling the air make you overwhelmed with positive emotions and good mood. I might sound a bit crazy but I do love and enjoy cooking.
So if you'd like some really good petite desserts to please your close ones as well as your own taste buds this one is a keeper.
Try and see for yourself.


Chocolate passion cupcakes

Ingredients:

batter:
50g cocoa powder
100ml hot water
100g butter, softened
200g fine sugar
2 eggs
170g flour
1tsp bicarbonate of soda
1/2 tsp baking powder

caramel filling:
half a tin dulce de leche
1tsp sea salt (fine or flakes), use to taste

chocolate ganache:
100ml cream
200g dark chocolate, broken into small pieces


Preparation:

  1. Combine cocoa powder and water and mix until smooth and without lumps. Let it cool.
  2. Beat together butter and sugar until well mixed and pale. Gradually add eggs. Sift dry ingredients (flour, bicarbonate of soda and baking powder). Using a metal spoon or a rubber spatula carefully fold the cocoa mixture until well combined.
  3. Preheat oven to 180C. Line 23-24 cupcake cases. Place about a tbsp of the mixture in each case. (I fill them half way. This way after the batter is baked into a perfect size cupcake - not too big and not too little). Bake your cupcakes for 20 minutes. Remove and leave to cool on a wire rack.
  4. In the meantime combine dulce de leche and salt. Start with small amount of salt and gradually add more until you reach the desired taste and flavor.
  5. You can either remove the center of the cupcake and fill it with salted caramel, then use the removed tops as lids or using a long thin piping nozzle insert it in the center of each cupcake and pipe some of the caramel filling inside. I use the second way as it is easier and faster for me. As well as less messy.
  6. To make ganache heat the cream until almost boils. Remove from the heat and stir in the chocolate. Stir until it forms smooth mass without lumps. If it seems very runny in the beginning don't worry it will thicken as the chocolate melts into the cream. Allow the cool slightly and using the back of a metal spoon frost each cupcake. Arrange this yummy goodness and leave to set before serving.
Enjoy with a cup of your favorite tea or just like that.

I couldn't stop only on one dessert so I decided to try making cake pops for the kids. Don't judge very strictly it was my first attempt.


That's all for now...
take care there.
Related Posts Plugin for WordPress, Blogger...